Tuesday, May 31, 2011

More Candle Works.

Hey there!

I hope everyone had a wonderful (holiday USA) weekend.  Stormy here in the Midwest....yikes.  We have had trees down, power down and enough excitement for one weekend that is for sure.

I wanted to give a quick second post to an earlier project on image & stamping on candles. (See my "Candle Works" post) So much fun and have had a great time doing this. :)

This time I took images from stamps, and old designs, cards etc... that I copied onto tissue paper.  I did a random collage of thoughts & words....
It isn't too difficult really.  You will just want to glue a piece of tissue paper to a piece of cardstock so it can go through your printer.  Try a little glue from a glue stick.  It works great and the same process is then followed, that you use to transfer the rubber stamped images from the tissue paper to the candle.  Quick & pretty!

I decided to of course make this kinda~cutesie~gifty and added a stray Limoges (French) lonely saucer that no longer has a cup to call home. I paired with my candle and ta~da, a cute base for burning.  Luckily I noticed these stray saucers in an antique shop locally and thought they would be perfect for this! You could also find them at flea markets & garage sales perhaps for a mere song. :)

Much too pretty to toss away.....


You can add a bow for the final touch as I did above and it's ready for giving and burning. Fun project to play with....as you can tell....I kinda like them. :)

I am going to be putting these in my Etsy shop so check in with me.

Candles~candles but...
The light to follow is the light within yourself. ♥ Story Waters

Tuesday, May 24, 2011

Sowing Seeds.....


This is an archived post I made on another blog that I wanted to share with you here.  I am still for awhile, going to be getting all of my past caught up in this new blog. 

Wait up...I am coming...... :)

This Winter, I had been pouring over books and getting new craft ideas to work on and this is an idea that came together with such ease I just knew it was meant to be. I love lavender. I came across an old craft book on lavender and projects for lavender and immediately loved this simple idea that popped out.  It is a quick easy do to create a great start, and to add purpose to all of that cleaning, fluffing, replacing, throwing out, planning and new beginnings associated with transitioning this time of year. YA!
Lavender...the best lavender, comes from France. No if, ands or buts about it. With all of the online resources today....that is where I purchased mine. It leaves no reason to settle for second best. There are different grades. There is a culinary grade, (yes, you can cook with lavender!) but I will leave that for another post sometime.
These paper packages shown, I discovered, are how loose lavender and sachets are sold at French markets. (Usually folded in brown paper.) This is an updated and embellished version. I thought how cute, practical and a great way to sell seeds and anything that is small and sold in a loose form!
I decided to give folding these a try and they turned out sooo great I now am in love with them.

Things needed & a quick tutorial for French paper folds ~

8 1/2 x 11 sheets of paper. A note on paper; I tried all kinds from expensive to inexpensive, heavy weight to lighter weight and plain copy paper and to be completely honest, the lighter less expensive paper, creases, folds and hold better than the more expensive choices....don't bother.
3 1/2 x 5 photo/digital images w/photocopier. (I found the images used here online for free!) Use any images of your choice and print towards the center of the paper so there is plenty of room to fold.
Loose dried lavender, seeds etc...
Hole Punch
Twine, ribbon, etc...

It is simply copy, fold, fill and tie off the end with a pretty finish.


These are great for drawers, cabinets, shelves, linens, lingerie, and anything you want to stay fresh and smelling great.

Now here in Michigan it is Spring so of course, we are talking, working and thinking Spring planting. It started me thinking this Winter that it is NEVER too early to begin some garden/harvest planning, so I also thought this was a great project & product/package for the Morning Glory seeds I saved last fall. Morning Glories and myself get along so well. They literally grow like weeds for me. I have them planted by an iron gate on the south side of my house. The seeds fall to the ground, they reappear and spring up every year without fail and without replanting or doing anything! They spread into the grass, shrubs and nearby anything else....so the seeds I harvested are lucky seeds. Anyone wanting to have success will find my seeds happy.


My Morning Glories. :)

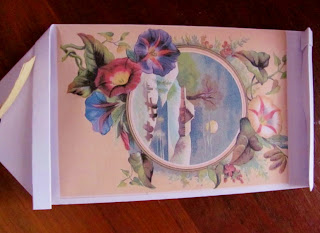
I found cute vintage photos for them as well at the Graphic Fairy website...and whala!  Cute Morning Glory seed packets!  Checkout the button on my blog that will link you to all things Graphics Fairy wonderful! All of the French and Morning Glory vintage photos and images here, are courtesy of the Graphics Fairy. Must plug her wonderful site! :)  I love the image below, with the snow scene in the center with Morning Glories surrounding the thoughts and hopes for warmer days...


For gifts & giving, these seeds produce the purple variety. These have been a wonderful item for me. I sold a set of 50 for bridal shower favors this Spring, so they have been popular.  The packets are complete with description and instructions tagged on the back. You will find the seeds & sachets in my Etsy shop.

 I am going to look forward to harvesting, packaging & selling seeds and other items in this great French way. :)

Saturday, May 21, 2011

Blogging ~ Honestly ~ What Took Forever (WTF)?

Wiht this new blog I am here learning and discovering and loving the fabulous world it opens up.  New networks, new friends, new discovering etc... I am thinking...honestly, what took forever (WTF)? :)

This is a really cute blog!  Honestly WTF has a fun, crafty DIY perspective on high fashion and style.   This post poses an interesting but serious question.  If your house was burning and only had time to grab a few things, what would they be? Something to think about.....

http://honestlywtf.com/art/the-burning-house

It is fun to post and feature a blog to love and this one is great!  If you scroll down to the bottom of my blog you will find some of my likes and other fun places to follow.  What blogs are your favorite and why?  Post and do share. :)

Bye for now.....

Julie

Tuesday, May 17, 2011

~ Blogger Memo ~

I've never seen a garden plot, although I'm small forget me not. ~ Cicely Mary Barker

Gee wiz.......

Just a Blogger update. Not sure if anyone else has had problems, but it seems Blogger has decided to be temperamental recently.  I am sending this out as a test post.  Always something.  Anyway...didn't want you to think I disappeared or anything.  I decided to give Blogger some time to get over its issues.  So don't forget me.....

I am posting some cute Forget~Me~Nots from my yard.  Even though cool, May is in bloom. Ya!
I will also share an updated Lily Of The Valley picture from my yard from my earlier post.  It is still cool and it has taken them sooo long to bloom but here they are. Finally.

Lily Of The Valley ~ my yard ~ 5-17-2011

Come follow, stay in touch and hopefully Blogger will cooperate! Bye for now..... :)


Monday, May 9, 2011

Candle Works

I am posting a simple, quick project I played with a few days ago that is fun, fun, fun! Easy too. (That is what we like sometimes...quick and easy.) This is my version of a rubber stamp image candle. 
I will share a link to a tutorial by Split Coast, but what I want you to know is that it is even easier than the tutorial lets on.  There is a craft tool described as a heat gun, if you are not crafty you may have not heard of one, but....(and this is a big BUT) I did mine with my hair dryer!  I decided to give it a try, just to see and......whala! Works just the same as you can see in the image above. Beautiful.  :)

So, without the heat gun, and if you have rubber stamps to play with, you can try this with items you may already have at home.  Love it.
Things you will need:
Stamp Ink Pad
Rubber Stamps
Scissors
Wax Paper
Tissue Paper
Hair Dryer
White (or light colored) Candles. Cheaper the better and unscented
Glitter/Ribbons/Embellishments ~ Optional

The first thing you will do is take a sheet of tissue paper and stamp the image that you would like on the tissue paper. You can play around with the size of the image and stamp according to the size of your candle etc...mine is simple here, but get creative!  Second, you are going to cut out that image. Cut as close to the edges as possible.
Third, you are going to place and position the image on the candle exactly where you would like it.
Next, you are going to take a piece of wax paper and wrap it around the candle, holding the image in place and helping melt the image into the surface of the candle. No need to tape or secure the wax paper, just scrunch and hold.  It helps keep the heat from your hands.
Finally, you are going to hold and heat the image with your hair dryer. Now I will tell you a heat gun will do this job in a couple of minutes and the hair dryer is going to take about 5 minutes or so.  Patience will pay off.  I use mine on "high" and it does get hot! Be careful.  As you apply the heat (holding quite close) you will see the tissue paper & image start to melt into the candle.  You can press and smooth over with your fingers, just to make sure it is securing, is flat and no air bubbles.  When it is done, you will see the wax paper get very shiny.  Carefully peel away the wax paper and finished!  The image you see above I actually sprinkled (you can do this before heating) with glitter and added a ribbon when done so it could make a cute gift but you can decorate with other items as well. 

I will add another post soon with colored images and pictures.  I have seen these done that way as well and they are terrific. 

                                                http://youtu.be/qksZHGuGjaM?hd=1
Enjoy the link and happy stamping!

Thursday, May 5, 2011

A New Spring Blog To Welcome!

Ya! So glad to be here!  I am going to give a quick post to get this blog off and running.  I finally have got a little bit more of a comprehensive place to stash all of my online biz and here it is. :)

"Who bends a knee where violets grow, a hundred secret things shall know." ~ Rachel Field

Spring has been slow in coming....sigh.   So far for color, just about all I have had in my yard are the wild violets that grow all over the place.  I have a shady yard anyway and still have tulips closed up tighter than a drum. Pretty but.....

Like many, I enjoyed the ideas and sights of the recent royal wedding and I couldn't help but love the use of the Lily of the Valley as bouquet floral selections.  So seasonal. So pretty.  I heard mentioned, that they are the Queens favorite.  Lily of the Valley are also the flower for May and having a May birthday they have always sprung up around the first part of the month, near my birthday.  I have a nice section of them in my yard and here we are.....May 5th and they are a little behind (even though they like cool/shade). Thank goodness the sun is finally out to give them the boost they seem to need.
Lily of the Valley ~ just about ready to bloom, my backyard ~ 5/5/2011.

The sun finally showing up was probably the bump this blog needed too! Ha!

I hope to post lots of fun things on top of this being just a great place to archive and journal ideas, work, writing, projects, to do's and the like.  I will be adding more of my favorite links and places so visitors can easily access and find.  If you see a project of interest or have a question, don't hesitate to contact me, my shop or this blog.  Be happy to respond or help.

Looking forward to it! The sun is shining...so gotta run..... :)